Behind the scenes of your transport: how are metros built?
Before building a metro, you have to imagine it
Before building a subway, it must be designed piece by piece and planning all the smallest details of its manufacture. A step, which can take up to two years.
Step 1: Design
The specifications
First of all, during the call for tenders, the company that places the order defines and writes its specifications.
Dimensions, architecture, interior fittings, driving mode (with or without driver's cab), safety, accessibility, on-board technologies... The specifications are the document that specifies all the requirements that the future train will have to meet (technical and functional requirements, all of which take into account the standards in force).
The builder of the future metro then proposed a model that would meet all the requirements and constraints.
The development phase
The deal is signed! The project can now be studied, imagined and designed down to the smallest detail.
It is at this stage that we decide on the shape of the metro, the parts required, the materials that will be used, but also the seats, the shape of the bars, or the way in which the doors will open. These are all details that count for the travelers' experience, their safety and the longevity of the vehicle.
Good to know
Throughout the production process, the client verifies that the specifications are respected and ensures that the metro is properly integrated into the complex environment of the Ile-de-France metro network.
Industrialization
To build a metro on a large scale, its construction must be industrialized. What does this mean?
That the engineering teams think about all the stages of manufacturing the metro and its equipment (air conditioning, seating, cladding, etc.). They also check that the train is in good connection with the equipment that will interact with it.
How to build the parts and where to buy them? Which step to start with? What tools will be needed? How much time and people for each construction stage? Everything is examined with a fine-tooth comb.
Now it's time to build
Step 2: Pre-equipment of the sub-assemblies
It was with this step that the metro began to take shape.
Traditionally, the manufacturer manufactured the body (i.e. the metal skeleton that will constitute, once equipped, the future vehicle).
For the new metros, the various parts, called sub-assemblies, that make up a vehicle (chassis, faces and roof) are pre-equipped before being assembled together.
This is the time for the installation of the windows, the door mechanisms, the insulation, the floor, the flooring, the first upholstery or even all the train wiring and the first connections of the electronic systems.
Good to know
The first trains manufactured (called "pre-series" trains) are used for validation tests before launching large-scale production.

Step 3: Assembly
Now that the four sides of the future vehicle have been equipped, they will be assembled together : this is called riveting.
The four sides are attached to each other by powerful bolts (rivets) to form the future car.
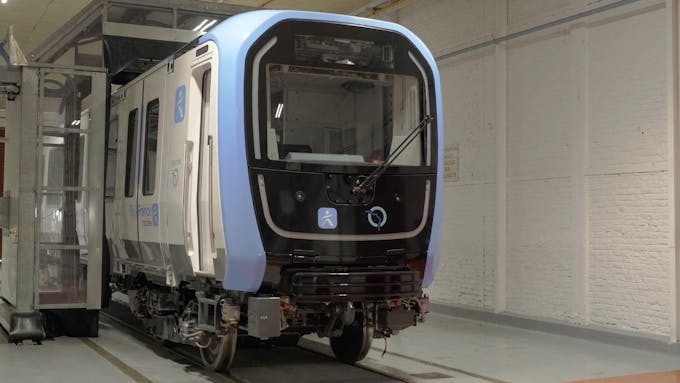
Step 4: lead vehicle or simple car, now is the time to decide
At this point, all the crates look the same and are open at the front and back. To finalize them and transform them into a car, we add to them:
- A cabin : it then becomes a lead vehicle with a space for the driver (if the metro is not automatic) or a window to allow passengers to observe the journey (in the case where the metro is automatic). It will be located at one end or the other of the metro train.
Yes
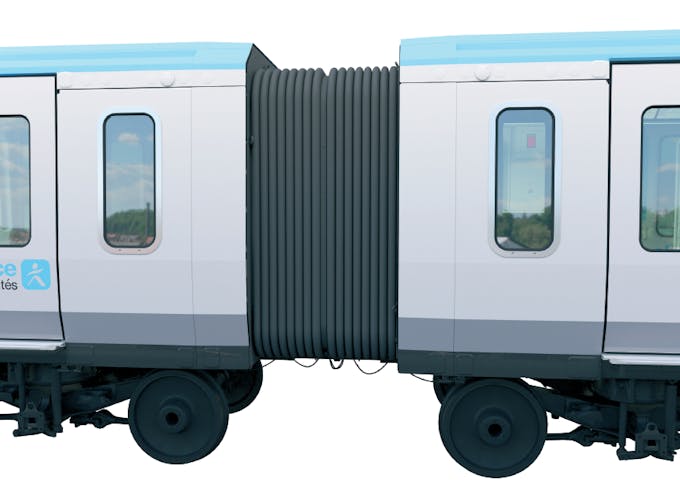
- An intercirculation system : this is the part that attaches one car to another. The carriages can be open on top of each other to allow passengers to move freely along the train (this is called a "boa" train) or closed between them.
Step 5: a second stage for the equipment and interior design
Electronics, air conditioning system, air filtration, doors, screens, seats, bars... The car continues to be equipped to accommodate travelers.
Step 6: bogie setting (which allows your metro to run)
The vehicle is ready to drive... or almost. It's time for the installation of the bogies - called the "bogie installation".
Whether your metro is railed or pneumatic, it is equipped with a bogie: a trolley located under the car and on which the wheels are fixed with axles.
The bogies allow the metro to run and follow the track correctly.

Step 7: Let's go for production
Once the very first car has been built, tested and readjusted to the needs, it is time for the production of the other cars.
Good to know
The first car took some time to build to give the teams time to test it, make final adjustments and get used to the new production procedures. But once the mechanics are oiled, the production rate accelerates to reach a maximum production rate !
Step 8: first train, validation along the entire line
A train is what you see arriving at the station when you wait for your metro: a set of cars assembled together.
Once the first train is finished, it can be tested from every angle to ensure the safety of passengers before being put into commercial circulation.